Monday, June 25, 2012

Mom & Me Book Club: "The Monster at the end of this Book"


We started hosting a Mom & Me book club after discovering this Mommy & Me Book Club website. They have such great ideas! We meet every other week for our book club and we follow the same the general pattern of circle-time, crafts, and activities as they do on the website. For this weeks Mom & Me Book club we picked the book, "The Monster at the end of this Book" by Jon Stone.  

Gathering Activity:
Keeping in the theme with Monsters we decided to have the kids make their own creative little monsters out of play-doh. They each got craft sticks, goggly eyes and beads to use as arms eyes or teeth. I saw this idea on this website. It was really fun to see what things they came up with. 


Circle Time:
During circle time we sang, "here we are together at Mommy & Me" and we sang through every child's name in attendance. Then we sang the "ABC's." (When we got to the letter of a child in the room they raised their hand and shouted their letter) Next we counted from 1-10 and back again from 10-1. Then we sang "If you're a Monster and you know it" (to the tune of if you are happy and you know it, but with monster things: growling, stomping...) Then we read the book, "The Monster at the end of this Book." We ended circle time by singing, "shake my sillies out" with the last line being, "tip toe my sillies out" as we tip toed over to the table for an activity.

Activity:
For our first activity we did a "don't turn the page" activity. We handed out several board books and let the children, using yarn, blocks and straws, attempt to make it so they could not turn the page. A few of the older kids actually accomplished this and everyone else just had a lot of fun knocking blocks onto the ground.


Activity:
For our next activity we played a version of "button button, who's got the button." Instead of a button we had a little toy monster that the kids passed around in a circle, while one kid left the circle and closed their eyes. We played "The Monster Mash" music as they passed the monster around and then paused the music. When the music stopped everyone put their hands behind their backs, including the person with the toy monster. Then the person who had their eyes closed got to come over and guess who had the monster and repeat. 

Craft: 
For a craft we made Grover monster faces. We found out how to make them at this website. We used paper plates as the base. We let the kids color a mouth with crayons and then they glued on shredded blue construction paper. Then glued on eyes and a nose on top of that. 


Show & Tell:
Each child also brings an item related to the book (if they can) for show and tell. They stand up in front of everyone, say their name, show what they brought and tell the group why is is related to the book or why it is special to them. 


Snack/lunch:

We made these fun monster sandwiches that we found at this website. We choose to use the black olives however, knowing that most kids would not eat the green ones. 


 And we also had some "lumber" pretzels, "rope" twizzlers, and "bricks" graham crackers. And many other fruits and fun snacks as well.


Tuesday, June 5, 2012

Mom & Me Book Club: The Grouchy Ladybug


We host a Mom & Me book club for Mommies and kiddos ages 3-6. Younger siblings generally tag along, but do not participate in the craft activities and such. For this week at Mom & Me Book Club we decided on the book, "The Grouchy Ladybug" by Eric Carle. We started hosting these book clubs after learning about this Mommy & Me Book Club website and we follow the general pattern of circle-time/crafts/activities, but this was the first time we picked our own book that was has not yet been done on the website. 

Gathering Activity:
Because the Grouchy Ladybug book goes through different times of the day, we decided to have the kids make their own paper plate clocks. We pre-cut out the numbers and different pieces for them to easily be able to glue on and and put together their own clocks. The kids used the clocks during the reading of the story and were able to move the hands to the times as were discussed in the book. 


Circle Time:
During circle time we all sang the song, "here we are together at Mommy & Me" and we sang through every child's name in attendance. Then we sang the "ABC's." Next we counted from 1-12 and back again from 12-1 (keeping in the theme with the clocks.) Then we read the book, "The Grouchy Ladybug." During the story we had the kids move the clocks to tell the time we were talking about in the book.  After we read through the book we did a sequencing activity where the kids all worked together to match clock times with the animals that the ladybug met. We got the photos for the sequencing activity on this website. Then we sang the song, "Ladybug" by Frank Leto. We ended circle time by singing, "shake my sillies out" with the last line being, "tip toe my sillies out" as we tip toed over to the table for a craft. 

Craft/Art Project:
For the craft we made construction paper ladybugs. We pre-cut the paper for the kids. For the body we had black circles and used slightly smaller red circles, cut in half for the wings. We used googly eyes and cut two small black strips of paper for the antennas. To make them curl you can wrap them around your finger or a pencil. The kids then got to use a black stamp pad with their fingers to put the dots on the ladybugs. 


Activities:
The first activity we did was "bug/animal freeze dancing." Every kid picked a bug or animal they wanted to pretend to be and we turned on ladybug themed music and let the kids crawl around or dance. Then paused the music for them to freeze and repeated. We only had time for one song for this activity and used, "Ladybug Picnic," but others that would have worked well include: ladybug ladybug, ugly bug ball, shoo fly, jitterbug, and rock around the clock.

For another activity we had a "Ladybug fight." We lined up the kids in two rows facing each other, (it ended up being more of a circle, but that works too) and we handed out little catapults that we had made previously. We found out how to make them at this website. Each kid got a catapult and a small pile of little craft pom poms or "Ladybugs" to fight each other with. The kids had a blast flinging them at each other. 


Show & Tell:
Each child also brings an item related to the book (if they can) for show and tell. They stand up in front of everyone, say their name, show what they brought and tell the group why is is related to the book or why it is special to them. 

Snack/Food:
For snack we had several ladybug themed foods along with foods that were black and red, and all the mom's attending brought something to share as well. We made this adorable grouchy ladybug watermelon with blackberries for the spots. 


 We also had these ladybug apples. using black berries for the heads and raisins for the spots. We used peanut butter to keep them in place.


Ladybug cupcakes with mini oreo heads, mini chocolate chip spots, and twizzlers antenna. 


Tuesday, May 22, 2012

Mom & Me Book Club: Llama Llama Red Pajama


For our Mom & Me Book Club this week we decided on a fun favorite of Llama Llama Red pajama by Anna Dowdney. For this book we pretty much got all of our ideas from the Mommy & Me Book club website. (Lot's of great ideas there!) Here is how it went for us.

Gathering activity:
First off, we encouraged everyone, Kids and Mom's included, to come in their pajamas! Red, if they had some. For the gathering activity we set out lots of pillows and blankets for everyone to sit on and Mom's and kids read through all different kinds of bedtime stories while we waited for others to arrive and for about 5-10 minutes after that. 


Snack/Food:
Because this particular book club was later in the day then others, we decided to have our snack before we started circle time. For snack/lunch we all brought red food to share and one Mom made these really cute Llama heads out of crescent rolls that we dipped in red sauce. Oh and we also had red fruit punch and other fun snacks too.


Circle time:
During circle time we all sang the song, "Here we are together at Mommy & Me" and sang through every child's name in attendance. Next we read through the book, Llama Llama Red Pajama." During the reading, when the little llama jumped and shouted, we had the kids get up and jump and shout along with him and so on as the llama did other things throughout the book. 


After reading the book we did the song and finger play, "There were Ten in the bed." Then we sang the song "Shake my sillies out" and we did some actions from the book. (stomp my sillies out, pout my sillies out and so on.) We always end that song with "tip toe my sillies out," as we tiptoe over to the table for a craft activity.

Craft/ Art Project:
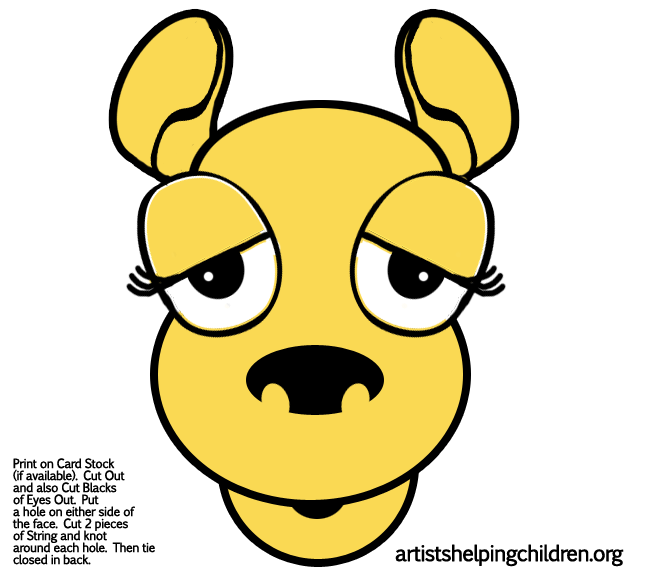
For our craft we made llama llama red pajama paper bag puppets. We printed out the llama heads and pajamas and cut them out ahead of time. Link here & here.  The kids got to glue the heads and pajamas on the bags and color. 


The kids and their finished llama puppets.


Activities: 
For one activity we played a game called the "wake up game." It was very simple. Basically all the kids lay down on pillows and blankets and pretend to be a sleep. Then the "Mama Llama" yells "Wake up baby llamas!" and all the kids wake up. That's it. But the kids thought it was SO fun. So we played it over and over and over. And we let the kids be the Mama Llama sometimes. 


Another activity we did was use a bed sheet to play with like a parachute. Each kid and mom held onto a piece of the sheet and we lifted it into the air, brought it back down, bounced balls on it, brought it down over the little kids so they could hide under it, lifted it back up and so on. Lots of fun. 


And here are a couple of llamas in their red pajamas...


Monday, May 7, 2012

Mommy & Me Book Club: Are You My Mother?


For this weeks Mommy & me book club we decided to do the book: Are you my mother, by P.D. Eastman. (Not Dr. Suess like so many people think. Although they were friends.) Anyways, we use this awesome Mommy & Me book club website to get most of our ideas and then sort of mix in other things that we find online or come up with. Here is how it went.

Gathering Activity:
As people were arriving we did the gathering activity. We wanted each kid to have a bird to hold during the story so we made paper bird puppets. We used brown paper bags, stickers, cut out paper, feathers and little googly eyes to make the birds. We got this idea from this website and this website.


Ready for storytime!

Circle time:
During circle time we all sang the song, "Here we are together at Mommy & me." Then we did the ABC's and and counted from 1-10 and backwards from 10-1. Then we read the book, "Are You My Mother." During the story we had each kid hold their bird and they would try to do the things that the bird did in the story. (When the baby bird looked up, their birds looked up, when the baby bird looked down, their birds looked down, and so on.) We also had them say, "Are you my mother" with us as we read those parts in the book. 

Activity:
After we read the book we did a little sequencing activity that we found on this website. We had several cut out photos from the book and had the kids work together to try to put them in the right order of the book. We also finished up circle time with the song shake my sillies out. We ended with tip toe over to the table for the craft.

Craft:
For the craft we made snorts from the story. They had brads on them so they could move and put the bird back into the next like in the story. For this project we used some cut-out pieces that we found on this website. Then just colored and glued them onto another piece of construction paper. 


 Activity:
For another activity we did a sound matching game. Each kid got a film canister filled with something that made a particular sound. There were 2 of each sound. The kids took turns trying to find their "mothers." They would turn to another person and ask, "are you my mother?" Then shake their film canister as the other person shook theirs and try to determine if the sounds matched. Then if it didn't match they would move on to the next person and so on, until everyone had found their "mother." We got this idea from this website.


Show & Tell:
Each kid brings along something to show the group. We encourage everyone to bring something that goes with the book, but its not required. Most everyone ends up just bringing something they like. Each kid gets up in front of the group, tells their name, shows their object and tells the rest about why they like it. And if it has to do with the book, why it is like the book.

Snack & food:
For food we had pb&J sandwiches that were cut into little egg shapes and set on top of pretzels to look like eggs in nests. 

We also had "worms in dirt." Gummy worms in chocolate pudding with crushed oreos on top. 


We also had a fruit tray, some fruit snacks and hard boiled eggs.


Friday, May 4, 2012

Baby bib out of old t-shirt

So I had an old t-shirt I was going to get rid of because I don't wear it anymore. So I used some of the fabric from it and made my daughters bear a baby bib. I didn't have a pattern, I just traced around a baby bib I already had and went from there. I had to make it a lot smaller to fit a tiny bear though. I mostly wanted some practice so that when I went to make some bibs for babys as gifts I would know what I was doing. The stitching is not perfect, my sewing machine was doing weird things, but it turned out cute any how and my daughter was very excited.  This was last week and her bear has not taken it off since. 


Wednesday, April 25, 2012

Piggy Hairbows


So my sister-in-law makes bows, and she is really excellent at it. She has taught me from time to time, but I'm not so great at it. So I haven't really made any in a long time. She found me some pig ribbon. And my daughter loves pigs, so I had to make some bows. I made 2 larger pinwheel style hair bows (I used a shorter ribbon length than suggested.) and two mini tuxedo style hair bows. I think they turned out pretty cute. And my daughter was overly thrilled to see these when I presented them to her. 


Saturday, April 21, 2012

Sewing! A baby blanket and 2 burp cloths


So I've had a sewing machine since my birthday a year and a half ago. I got it right after having a baby. Maybe that was really bad timing, because this said baby was very stubborn and did not go to bed at night. This did not allow for much time to practice.  So the whole learning to sew thing, sort of got pushed to the side for awhile.  A long while. Anyways, then I tried to learn later on, but kept getting frustrated because I kept getting the thread tangled in knots and was just having a hard time. Then I moved to a new house and the sewing got pushed aside again. Then I got frustrated again. I finally discovered that I was using the wrong type of thread. A super thick thread too. No wonder I was having problems. Oops! Make sure you got the right thread if you are learning to sew. That will make things a lot easier.

Anyways...I'm still not amazing at sewing, but I finally feel like I've gotten to know my sewing machine enough to work with it and actually accomplish things without going away super frustrated. Yay! This week I had a baby shower to go to so I decided to make a baby blanket with matching burp cloths. This was a good starter project because it is relatively simple, (still takes work) and it turns out really cute. I got 2 different flannel fabric pieces I liked. (One for the back and one for the front.) 1 1/2 yards of each. I used 1 yard for the blanket and the remaining 1/2 yard is just enough to make 2 burp cloths out of.  I washed the fabric first. Unfortunately the fabric got a bit frayed and ripped up in the washer. It also did a lot of pilling. Fortunately this was fixable, but took time. I trimmed around the frayed parts at the edge and there was still enough fabric for the blanket. I also found a sweater comb to get out all the pilling. (A cat brush also worked.)

For the blanket I took the two yard size pieces of fabric lay them together right sides facing each other.  Pinned them together, and sewed around the edges, leaving a gap open, to turn the blanket inside out and allow the right sides to now face out. Then I ironed the blanket. Last I top stitched around the edges  of the entire blanket, closing up the gap in the process.
 
For the burp cloths I pretty much did the same thing as I did with the blanket, only I used a free pattern that I found online for the shape. I was also left with just enough fabric that I should be able to make a little bib and burp cloth for my daughters teddy bear.